Bridging between Matrix and Telegram
Updated 23 Septembre 2019
Enregistrement de l'API
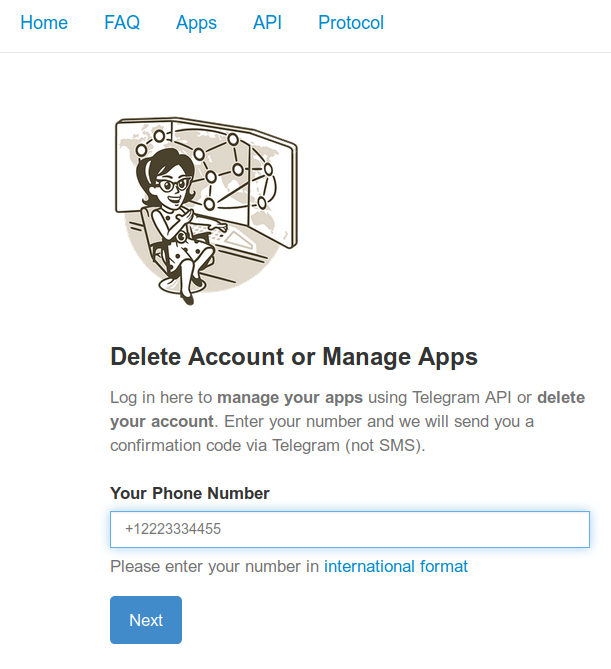
Pour établir un pont entre Matrix et Telegram, commencez par enregistrer l'API :

Vous aurez besoin des valeurs api_id et api_hash pour faire le pont, ainsi que des adresses MTProto du serveur.
Enregistrement d'un bot
Depuis votre client Telegram, accédez à la boîte de dialogue BotFather en cliquant sur le lien.
Commencez une conversation et créez votre exemple_bot en procédant comme suit :
/start
/newbot
example_bot
Vous verrez quelque chose comme :
Done! Congratulations on your new bot. You will find it at t.me/example_bot. You can now add a description, about section and profile picture for your bot, see /help for a list of commands. By the way, when you've finished creating your cool bot, ping our Bot Support if you want a better username for it. Just make sure the bot is fully operational before you do this.

Use this token to access the HTTP API:
123456789:abcdefghijklmniopqrstuvwxyzABCDEFGH
Keep your token secure and store it safely, it can be used by anyone to control your bot.

For a description of the Bot API, see this page: https://core.telegram.org/bots/api
Rappelez-vous ce que vous obtenez comme BOT_TOKEN : 123456789:abcdefghijklmniopqrstuvwxyzABCDEFGH.
Pour permettre au robot d'accéder aux discussions des groupes auxquels il appartient :
/setprivacy
@example_bot
Disable
Activez le bot en vous rendant sur ~t.me/example_bot~ et en lui envoyant comme message :
/start
Préparer un conteneur LXC
Nous recommandons de configurer votre passerelle dans un conteneur distinct, créé comme expliqué dans le manuel.
Installer le logiciel
Installez FFmpeg pour permettre au service de traiter les vidéos Telegram :
emerge -a media-video/ffmpeg
Créez et activez un environnement virtuel pour Python :
mkdir -p /var/calculate/matrix-telegram
cd /var/calculate/matrix-telegram
python3 -m venv .
source bin/activate
Installez Matrix-Telegram et le module de fonctionnement via SOCKS5 dans l'environnement virtuel :
pip install --upgrade mautrix-telegram[all]
pip install PySocks
Copiez le fichier de configuration example-config.yaml dans config.yaml :
cp example-config.yaml config.yaml
Veuillez ajuster les paramètres de la passerelle, où :
https://matrix.example.orgest l'adresse de votre serveur Matrixmatrix.example.orgest le domaine MXIDhttp://matrix-telegram:8080est l'adresse du pont123456est l'identifiant API que vous avez créé précédemmentsecret_hashest l'api_hash que vous aurez créé
homeserver:
    # The address that this appservice can use to connect to the homeserver.
    address: https://matrix.example.org
    # The domain of the homeserver (for MXIDs, etc).
    domain: matrix.example.org
appservice:
    address: http://matrix-telegram:8080
    # Public part of web server for out-of-Matrix interaction with the bridge.
    # Used for things like login if the user wants to make sure the 2FA password isn't stored in
    # the HS database.
    public:
        # Whether or not the public-facing endpoints should be enabled.
        enabled: false
# Permissions for using the bridge.
# Permitted values:
#   relaybot - Only use the bridge via the relaybot, no access to commands.
#       user - Relaybot level + access to commands to create bridges.
#  puppeting - User level + logging in with a Telegram account.
#       full - Full access to use the bridge, i.e. previous levels + Matrix login.
#      admin - Full access to use the bridge and some extra administration commands.
# Permitted keys:
#        * - All Matrix users
#   domain - All users on that homeserver
#     mxid - Specific user
permissions:
    "*": "relaybot"
    "@admin:matrix.example.org": "admin"

telegram:
    api_id: 123456
    api_hash: secret_hash
    bot_token: bot_token
Ajoutez les paramètres suivants pour pouvoir utiliser SOCKS5 1.2.3.4:1080 :
telegram:
    # Telethon proxy configuration.
    # You must install PySocks from pip for proxies to work.
    proxy:
        # Allowed types: disabled, socks4, socks5, http
        type: socks5
        # Proxy IP address and port.
        address: 1.2.3.4
        port: 1080
        # Whether or not to perform DNS resolving remotely.
        rdns: true
        # Proxy authentication (optional).
        username: "sockuser"
        password: "secret"
Créez un fichier d'enregistrement pour permettre à l'application d'échanger avec le serveur Matrix :
python -m mautrix_telegram -g -r registration_telegram.yaml
Copiez le fichier d'enregistrement dans Synapse :
scp registration_telegram.yaml root@synapse:/var/calculate/synapse/
Ajoutez le fichier d'enregistrement à la configuration de Synapse :
app_service_config_files:
    - registration_telegram.yaml
Redémarrez Synapse :
/etc/init.d/synapse restart
Pour que la passerelle puisse fonctionner, il faut reconfigurer la base de données :
alembic upgrade head
Démarrage de la passerelle
Créez un script OpenRC pour gérer le démon de la passerelle Matrix-Telegram :
#!/sbin/openrc-run
# Copyright 2019 Gentoo Authors
# Distributed under the terms of the GNU General Public License v2

name="Matrix-Telegram daemon"
description="Matrix Telegram bridge daemon"
command=/var/calculate/matrix-telegram/bin/python3
command_args="-m mautrix_telegram -r registration_telegram.yaml"
directory=/var/calculate/matrix-telegram
pidfile="/run/matrixtelegram.pid"
command_background=true
Modifier les droits d'accès au besoin :
chmod 755 /etc/init.d/matrix-telegram-bridge
Lancez le démon :
/etc/init.d/matrix-telegram-bridge start
Mettez-le sur la liste de démarrage automatique :
rc-update add matrix-telegram-bridge
Intégrer des groupes Matrix à des groupes Telegram
Obtenir l'identifiant d'un groupe Telegram
Invitez votre robot Telegram dans le bon groupe :
curl "https://api.telegram.org/botBOT_TOKEN/getUpdates
{"ok":true,"result":[{"update_id":123451234,
"message":{"message_id":12345,"from":{"id":123451234,"is_bot":false,"first_name":"User","username":"Username"},
"chat":{"id":-100123456789,
"title":"Groupname","username":"calculate_talk","type":"supergroup"},
"date":1553239850,"new_chat_participant":
{"id":123451234,"is_bot":true,"first_name":"Example bot","username":"example_bot"},"new_chat_member":{"id":123451234,"is_bot":true,"first_name":"Example bot","username":"example_bot"},"new_chat_members":[{"id":123456789,"is_bot":true,"first_name":"Example bot","username":"example_bot"}]}}]}
Obtenir l'identifiant d'une chaîne Telegram
Définissez le bot en tant qu'administrateur du canal et tapez /id :
curl "https://api.telegram.org/botBOT_TOKEN/getUpdates
"channel_post":{"message_id":123,
"chat":{"id":-1001123456789,
"title":"Example Channel","type":"channel"},"date":1553242405,"text":"/id","entities":[{"offset":0,"length":3,"type":"bot_command"}]}}]}
Rejoindre une salle de discussion
Invitez le bot @telegrambot:matrix.example.org dans votre salle de discussion.
Intégrez la salle de discussion concernée à une chaîne ou un groupe Telegram en utilisant son identifiant, ~~-1001123456789~. Pour envoyer un message à la salle de discussion commune :
!tg bridge -1001123456789
!tg continue