Installing on a HDD
Updated 26 December 2019
Once you have booted Calculate Linux from a Live USB, you can install it on your hard drive. To do so, simply click on the "Installing Calculate Linux" icon on your desktop.

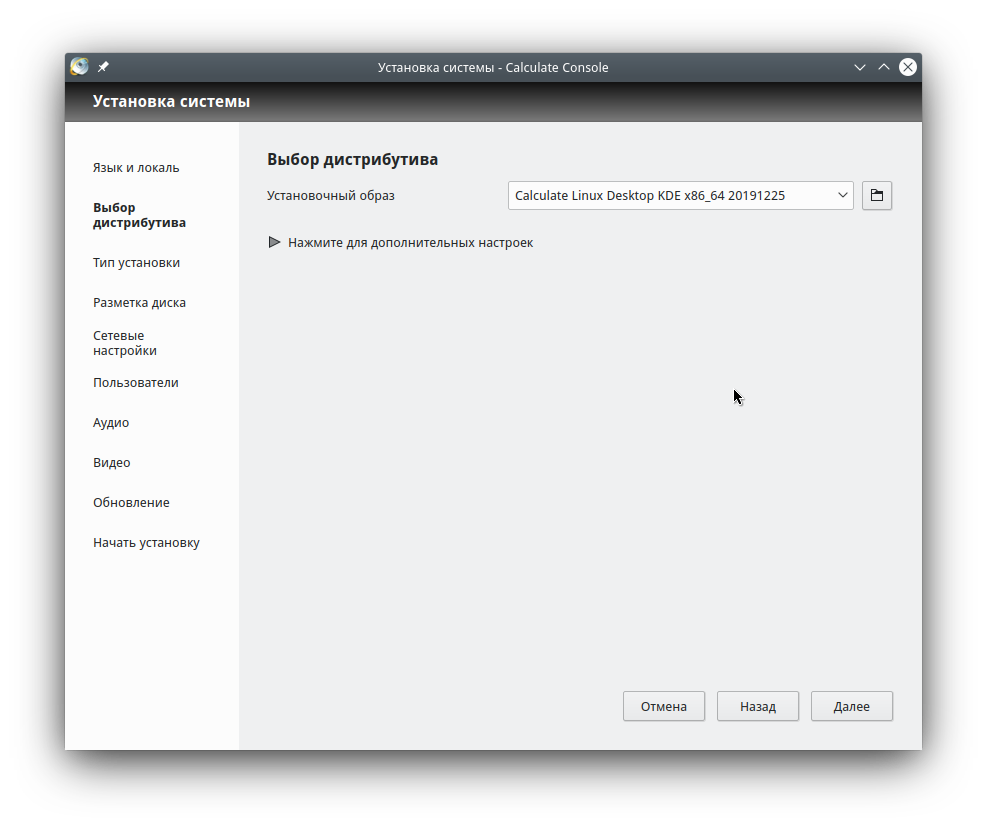
The installation window is split in two. In the right part, you can select installation options and switch between sections. In the left part, partition names are listed. You can use either the keyboard or the menu to select a section. All sections are explained below.
Language and locale
Select the system language and the timezone. You can choose between 38 languages. The language you have chosen will be applied at installation time.

Selecting the flavour
By default, the installer picks the Live USB from which you booted. You might also want to specify another bootable Calculate Linux ISO image that you would have loaded.

Installation type
Depending on whether you want to delete all data from the disk and install Calculate Linux on new partitions or use existing partitions to install, select either "Clean disk and install Calculate Linux" or "Use existing partitions".
If you choose the first option, click on the dropdown menu to select partitioning options. Here you will see the partitions to be created. See [here] (disk_partitioning) to learn more about the disk partitioning scheme that we suggest.

Disk partitioning
If you want to install on existing partitions, specify them for your Calculate Linux installation. If you chose to install on an empty disk, at this point you can only check the partition table.
Note that the third partition reserved for updates will not be displayed there, because it is not mounted. Besides, the table does not display the fourth "BIOS Boot" partition, required by the bootloader when using the default GPT partition table.

Network settings
In this section, choose between NetworkManager and OpenRC to manage your connections and edit your network settings. If you have a desktop computer, we recommend using OpenRC for its functionality combined with low system load. Networkmanager is a better choice for notebook, as it comes with a graphical interface for establishing WiFi connections in a more user-friendly way.

Users
Here you must specify all the users bound to have access to the system, together with the privileges that will be granted them. The root password must be specified in the same window. Check the advanced settings for home directory encryption options.

In addition to assigning access groups, you can specify additional administrative rights here. There are two options in the "Administrator" field for this purpose: "System update" and "Full access". System update enables notifications about the available software and system updates. Full access adds the user to the "su" and "sudo" groups to grant them password-protected superuser rights with the sudo tool.

Audio
You can choose between ALSA and PulseAudio. Use ALSA if you want to reduce your processing overhead and get the best possible sound quality. PulseAudio is a better choice if you use pluggable USB speakers, as it provides easy sound switching.

Video
In the video settings, you can select the Nvidia proprietary driver, switch between the graphical and the text version of Grub. The screen resolution is most likely to be determined correctly from the start.

Update
Calculate Linux is a rolling release distribution. That is, if you update your system regularly, you will always get the latest software versions. By default, your software is updated every 24 hours. In any case, we recommend that you check for updates at least once a month.

Start installation
Before installing Calculate Linux, make sure that all settings are correct. If not, go back to the relevant section and edit. If everything looks OK, just click on "Run" for the installation to start.
