Installation of Calculate LXC Desktop

Warning
The work on project has been ceased
Introduction
LXC-desktop is a comprehesive, self-contained execution environment with a graphical interface. Calculate Linux Container (CLC) can be used then as a host system. You can install into a container from Calculate Container Desktop Xfce (CCDX). While CLC has no graphical interface and comes with the bare minimum of package out-of-box, CCDX is almost a complete replica of Calculate Linux Desktop Xfce - with the exception of the kernel, bootloader and some system tools.
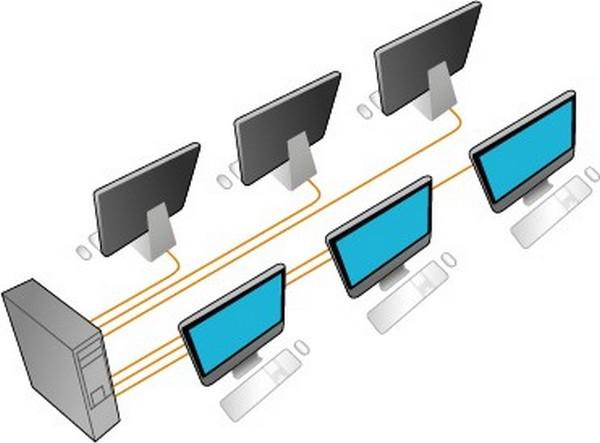
With a LXC desktop, you get all the advantages of working with containers, such as system isolation, minimum system requirements when starting multiple containers, the ability to install, configure, boot, etc. in no time. Systems running in a container are not connected to the host system in any way. You can link them to one or more monitors (if using multiple video cards), while benefiting from the hardware capabilities of both video cards.
Configure the host system
Calculate Linux Container should be used as the host system. If you install from another system, you will have to install app-emulation/lxc first.
Install Calculate on the hard disk and do as described above.
Network configuration
To access the container network, create an eth0 bridge. To do so, apply the following parameters:
/etc/conf.d/net
modules="!plug"
ifplugd="--no-beep"
config_eth0="null"
bridge_br0="eth0"
config_br0="dhcp"
bridge_stp_state_br0=0
bridge_hello_time_br0=1000
bridge_forward_delay_br0=0
Restart the network:
/etc/init.d/net.eth0 stop
rm /etc/init.d/net.et*
ln -sf /etc/init.d/net.lo /etc/init.d/net.br0
/etc/init.d/net.br0 start
Install lxc-desktop
Let's install Calculate Container Desktop Xfce in the container. To do so, run:
lxc-create -t download -n pc100 -- --server mirror.calculate-linux.org --no-validate -d CCDX --arch x86_64
(note that you have to specify the version name)
where pc100 is the container that will be configured and used as a network name.
Configuring the container
Add network settings for the container and append / sys writing permissions, appending the following to the file:
/var/calculate/lxc/pc100/config
# Network configuration
lxc.net.0.type = veth
lxc.net.0.flags = up
lxc.net.0.name = eth0
lxc.net.0.link = br0
lxc.net.0.hwaddr = 02:03:04:05:06:07

lxc.mount.auto = cgroup:mixed proc:mixed sys:rw
lxc.environment = LXC_DESKTOP=1
Replace 02:03:04:05:06:07 with something else. Note that the first figure must be even.
Configuring the system in the container
Now start the container:
lxc-start -n pc100
You will be prompted for a password in a window. At the first boot, a guest user with password "guest" will be created. Hit Ctrl + Alt + F1 to return to the command line.
Edit the basic settings, such root password, ssh start, system locale. Now restart the container:
lxc-attach -n pc100 passwd
lxc-attach -n pc100 -- cl-setup-locale -l fr_FR --timezone Europe/Paris
lxc-stop -r -n pc100
Replace fr_FR and Europe/Paris with your locale and timezone.
Adding the container to autostart
To add the container to autostart, run:
ln -sf /etc/init.d/lxc /etc/init.d/lxc.pc100
rc-update add lxc.pc100
In order for the system in the container to start after the network is up, create a lxc file:
/etc/conf.d/lxc
rc_want="net.br0"
Configure multiple containers to be used with one workstation
Configure the host system
Create a file with udev rules to separate output devices, attributing tty7 to container pc100 and tty8 to container pc101:
/etc/udev/rules.d/95-id-lxc.rules
ACTION=="add|remove", KERNEL=="tty7", ENV{ID_LXC}="pc100"
ACTION=="add|remove", KERNEL=="tty8", ENV{ID_LXC}="pc101"
Important
Do not replace 95 in the filename.
Reread the udev rules to confirm the modifications:
/etc/init.d/udev reload
Configuring the first container
Edit the system settings of the first container:
/var/calculate/lxc/pc100/rootfs/etc/calculate/ini.env
[xorg]
vt = 7
Update the system settings in the container:
lxc-attach -n pc100 cl-setup-system
Installing the second container
To install the second container, run:
lxc-create -t download -n pc101 -- --server mirror.calculate-linux.org --no-validate -d CCDX --arch x86_64
(note that you have to specify the version name)
where pc101 is the name of the container used for further configuration and used as its network name.
Configuring the second container
Add network settings for the container and append / sys writing permissions, appending the following to the file:
/var/calculate/lxc/pc101/config
# Network configuration
lxc.net.0.type = veth
lxc.net.0.flags = up
lxc.net.0.name = eth0
lxc.net.0.link = br0
lxc.net.0.hwaddr = 04:05:06:07:08:09

lxc.mount.auto = cgroup:mixed proc:mixed sys:rw
lxc.environment = LXC_DESKTOP=1
Replace04:05:06:07:08:09 with any other MAC address. Keep in mind that the first number must be even.
Configure the second container by analogy with the first, specifying terminal 8 for it:
/var/calculate/lxc/pc101/rootfs/etc/calculate/ini.env
[xorg]
vt = 8
Run the second container and perform the basic settings, such as defining the root password, the ssh policy, the system locale, etc. Now update all settings:
lxc-start -n pc101
lxc-attach -n pc101 passwd
lxc-attach -n pc101 -- cl-setup-locale -l ru_RU --timezone Europe/Paris
Replace fr_FR and Europe/Paris with your locale and timezone.
Add the second container to autostart:
ln -sf /etc/init.d/lxc /etc/init.d/lxc.pc101
rc-update add lxc.pc101
Restart both containers:
lxc-stop -r -n pc100
lxc-stop -r -n pc101
To switch between two running lxc-desktop sessions, use the Ctrl + Alt + F7 andCtrl + Alt + F8 shortcuts.
Configure multiple containers to be used with multiple workstations

To run this configuration, you will need a system unit with several video cards.
Distributing USB devices
There are two ways to distribute devices between two workstations: either by separating USB ports on the motherboard or by separating USB hub devices for each workstation.
For the first option, consider running the monitor of the connected devices and connecting the devices alternately to all USB ports. At the output, you get a log so that you can map the system path of the device and the USB port:
UDEV  [5101.730402] add      /devices/pci0000:00/0000:00:14.0/usb1/1-2 (usb)
UDEV  [5101.775152] bind     /devices/pci0000:00/0000:00:14.0/usb1/1-2 (usb)
UDEV  [5101.775593] change   /devices/pci0000:00/0000:00:14.0/usb1/1-2 (usb)
UDEV  [5101.780696] change   /devices/pci0000:00/0000:00:14.0/usb1/1-2 (usb)
UDEV  [5103.337561] unbind   /devices/pci0000:00/0000:00:14.0/usb1/1-2 (usb)
UDEV  [5103.337581] remove   /devices/pci0000:00/0000:00:14.0/usb1/1-2 (usb)
UDEV  [5106.507789] add      /devices/pci0000:00/0000:00:14.0/usb1/1-1 (usb)
UDEV  [5106.552851] bind     /devices/pci0000:00/0000:00:14.0/usb1/1-1 (usb)
UDEV  [5106.552960] change   /devices/pci0000:00/0000:00:14.0/usb1/1-1 (usb)
UDEV  [5106.559699] change   /devices/pci0000:00/0000:00:14.0/usb1/1-1 (usb)
UDEV  [5107.587480] unbind   /devices/pci0000:00/0000:00:14.0/usb1/1-1 (usb)
UDEV  [5107.587513] remove   /devices/pci0000:00/0000:00:14.0/usb1/1-1 (usb)
UDEV  [5109.653942] add      /devices/pci0000:00/0000:00:14.0/usb1/1-10 (usb)
UDEV  [5109.714358] bind     /devices/pci0000:00/0000:00:14.0/usb1/1-10 (usb)
UDEV  [5109.714593] change   /devices/pci0000:00/0000:00:14.0/usb1/1-10 (usb)
UDEV  [5109.720462] change   /devices/pci0000:00/0000:00:14.0/usb1/1-10 (usb)
UDEV  [5110.624758] unbind   /devices/pci0000:00/0000:00:14.0/usb1/1-10 (usb)
UDEV  [5110.624792] remove   /devices/pci0000:00/0000:00:14.0/usb1/1-10 (usb)
...
The difficulty of confronting the device and USB port paths is that USB ports with USB3 support are identified in a different way according to whether you connect them to a USB3 device (for example, a USB Flash drive) or a USB1 / USB2 one (for example, a mouse). This is also what you read in the log above (a mouse was connected first, then an USB HDD device). What you get:
| port | USB type | device |
|---|---|---|
| PORT1 | USB 1-3 | /devices/pci0000:00/0000:00:14.0/usb1/1-9 |
| PORT2 | USB 1-3 | /devices/pci0000:00/0000:00:14.0/usb1/1-10 |
| PORT3 | USB 2-3 | /devices/pci0000:00/0000:00:14.0/usb2/1-2 |
| PORT3 | USB 1 | /devices/pci0000:00/0000:00:14.0/usb2/2-2 |
| PORT4 | USB 2-3 | /devices/pci0000:00/0000:00:14.0/usb1/1-1 |
| PORT4 | USB 1 | /devices/pci0000:00/0000:00:14.0/usb2/2-1 |
| PORT5 | USB 1-3 | /devices/pci0000:00/0000:00:14.0/usb1/1-12 |
| PORT6 | USB 1-3 | /devices/pci0000:00/0000:00:14.0/usb1/1-11 |
To assign ports 1-3 to workstation pc100 and ports 4-6 to workstation pc101, add the following rules:
/etc/udev/rules.d/95-id-lxc.rules
# USB devices
ACTION=="add|remove", DEVPATH=="/devices/pci0000:00/0000:00:14.0/usb1/1-9/*", ENV{ID_LXC}="pc100"
ACTION=="add|remove", DEVPATH=="/devices/pci0000:00/0000:00:14.0/usb1/1-10/*", ENV{ID_LXC}="pc100"
ACTION=="add|remove", DEVPATH=="/devices/pci0000:00/0000:00:14.0/usb1/1-2/*", ENV{ID_LXC}="pc100"
ACTION=="add|remove", DEVPATH=="/devices/pci0000:00/0000:00:14.0/usb2/2-2/*", ENV{ID_LXC}="pc100"

ACTION=="add|remove", DEVPATH=="/devices/pci0000:00/0000:00:14.0/usb1/1-1/*", ENV{ID_LXC}="pc101"
ACTION=="add|remove", DEVPATH=="/devices/pci0000:00/0000:00:14.0/usb2/2-1/*", ENV{ID_LXC}="pc101"
ACTION=="add|remove", DEVPATH=="/devices/pci0000:00/0000:00:14.0/usb1/1-12/*", ENV{ID_LXC}="pc101"
ACTION=="add|remove", DEVPATH=="/devices/pci0000:00/0000:00:14.0/usb1/1-11/*", ENV{ID_LXC}="pc101"
It is much simpler with USB hubs, since in this case all you have to do is define and add one port, the one to which the device is connected. All devices connected to the hub will be located in the path.
Separating graphics cards
If you use video devices from different manufacturers - for example, a built-in Intel card and an external ATI, then you need to add the radeon module to autostart. To do so, add the following entry:
/etc/modules-load.d/lxc-desktop.conf
radeon
Remove radeon from the list of modules that will not be loaded:
/etc/modprobe.d/blacklist-calculate.conf
# hplip and cups 1.4+ use raw USB devices, so it requires usblp not be loaded
blacklist usblp

# You probably want this to not get the console beep loud on every tab :)
blacklist pcspkr

# Not using kernel video drivers
blacklist amdgpu
blacklist nouveau
blacklist nvidia
#blacklist radeon
blacklist uvesafb
blacklist vboxvideo
Restart modules-load:
/etc/init.d/modules-load restart
To get the system paths of the video cards, run:
udevadm trigger -c add -nv -s drm | awk -F/drm/ '{print $1}' | uniq
/sys/devices/pci0000:00/0000:00:01.0/0000:01:00.0
/sys/devices/pci0000:00/0000:00:02.0
To view information about the card, run:
udevadm info /sys/devices/pci0000:00/0000:00:01.0/0000:01:00.0
To assign ATI to container pc100 and Intel to container pc101, add the following entry:
# Video
ACTION=="add|remove", DEVPATH=="/devices/pci0000:00/0000:00:01.0/0000:01:00.0/*", ENV{ID_LXC}="pc100"
ACTION=="add|remove", DEVPATH=="/devices/pci0000:00/0000:00:02.0/*", ENV{ID_LXC}="pc101"
Terminals
To make the Xorg server of container pc100 run on tty7 and the one of container pc101 ontty8, you have to add the corresponding rules:
/etc/udev/rules.d/95-id-lxc.rules
ACTION=="add|remove", KERNEL=="tty7", ENV{ID_LXC}="pc100"
ACTION=="add|remove", KERNEL=="tty8", ENV{ID_LXC}="pc101"
Sound
If you have only one audio card, the sound subsystem may be assigned to one container only. If you have two audio cards, first view the list of paths to the respective devices:
udevadm trigger -c add -nv -s sound
Then add the relevant rules to udev. Do not forget to enable the /sys/devices/virtual/sound/timer device for all of your containers that have sound.
Here is an example of enabling all sound devices for one container:
/etc/udev/rules.d/95-id-lxc.rules
ACTION=="add|remove", SUBSYSTEM=="sound", ENV{ID_LXC}="pc100"
One more of enabling several audio cards for multiple containers:
/etc/udev/rules.d/95-id-lxc.rules
# audio (udevadm trigger -c add -nv -s sound)
ACTION=="add|remove", DEVPATH=="/devices/pci0000:00/0000:00:1f.3/*", ENV{ID_LXC}="pc100"
ACTION=="add|remove", DEVPATH=="/devices/pci0000:00/0000:00:1f.4/*", ENV{ID_LXC}="pc101"
ACTION=="add|remove", DEVPATH=="/devices/virtual/sound/timer", ENV{ID_LXC}="pc100 pc101"
PS/2
Enable the PS/2 port for container pc101 by adding the corresponding rules:
/etc/udev/rules.d/95-id-lxc.rules
# PS/2
ACTION=="add|remove", DEVPATH=="/devices/platform/i8042/*", ENV{ID_LXC}="pc101"
Configuring the containers
Start the first container and apply the system configuration:
lxc-start -n pc100
/var/calculate/lxc/pc100/rootfs/etc/calculate/ini.env
[xorg]
busid = PCI:1:0:0
sharevts = on
vt = 7
To check the busid parameter, use lspci:
00:02.0 -> PCI:0:2:0
01:00.0 -> PCI:1:0:0
Adjust video settings and general settings of the first container:
lxc-attach -n pc100 -- cl-setup-video --video radeon
lxc-attach -n pc100 cl-setup-system
Start the second container similar to the first one and apply the system configuration. Specify terminal 8:
lxc-start -n pc101
/var/calculate/lxc/pc101/rootfs/etc/calculate/ini.env
[xorg]
busid = PCI:0:2:0
sharevts = on
vt = 8
Apply the video settings and the general system settings for the second container:
lxc-attach -n pc101 -- cl-setup-video --video intel
lxc-attach -n pc101 cl-setup-system
Restart both containers.
lxc-stop -r -n pc100
lxc-stop -r -n pc101