Collabora Online
Updated 6 May 2020

Collabora Online is a collaborative office suite based on LibreOffice that supports all main document, spreadsheet and presentation file formats and can be used in any currently available browser.
To be able to work with Collabora Online, you will need a Docker container for editing documents and Nextcloud.
Installing and configuring Nextcloud
Install and configure Nextcloud according to the manual.
Configuring a Collabora Online server
To run the server part Docker will be used, which is a tool for automating the deployment and management of applications in the virtualization environment at the operating system level.
Install Docker and the cgroups control package:
emerge -a app-emulation/docker
Run cgconfig to create CGroup systemd:
/etc/init.d/cgconfig start
If using Docker inside a LXC container with Nextcloud on a host system, load all necessary kernel modules and add them to autostart:
modprobe -a br_netfilter ip_tables nf_conntrack_netlink nf_nat nf_nat_ipv4 overlay xt_conntrack
echo -e "br_netfilter\nip_tables\nnf_conntrack_netlink\nnf_nat\nnf_nat_ipv4\noverlay\nxt_conntrack" > /etc/modules-load.d/docker.conf
Start Docker and add it to autostart:
/etc/init.d/docker start
rc-update add docker
Get and start the Collabra Online container for Nextcloud. Note the double backslash.
Note
Nextcloud and Collabora Online must use the same protocol (HTTP or HTTPS).
Creating and running an HTTP container
If you want to use the HTTP protocol, start the container simply specifying the domain on Nextcloud:
docker run --name office -t -d -p 9980:9980 -e 'DONT_GEN_SSL_CERT=true' -e 'extra_params=-o:ssl.enable=false' -e 'domain=cloud\\.example\\.org' --restart always --cap-add MKNOD collabora/code
Once completed, a container named office~ will be created and started. The container will start automatically as the system boots up when the Docker daemon is started.
Creating and running an HTTPS container
If you want to use the HTTPS protocol, start the container by running the following command, which specifies the certificate, the private key and the domain on Nextcloud:
FULLCHAIN="/etc/nginx/ssl/cloud.example.org/fullchain.pem"
PRIVKEY="/etc/nginx/ssl/cloud.example.org/privkey.pem"
DOMAINNAME="cloud.example.org"
docker run --name office -t -d -p 9980:9980 -v "${FULLCHAIN}":/etc/loolwsd/ca-chain.cert.pem -v "${PRIVKEY}":/etc/loolwsd/key.pem -v "${FULLCHAIN}":/etc/loolwsd/cert.pem -e 'DONT_GEN_SSL_CERT=true' -e "domain=${DOMAINNAME//./\\.}" --restart always --cap-add MKNOD collabora/code
Once completed, a container named office~ will be created and started: The container will start automatically as the system boots up when the Docker daemon is started.
Checking the container status
To view the status of your container, type:
CONTAINER ID        IMAGE               COMMAND                  CREATED             STATUS              PORTS                      NAMES
6783472582fe        collabora/code      "/bin/sh -c 'bash st…"   2 minutes ago       Up 2 minutes        127.0.0.1:9980->9980/tcp   office
To view the server log, run this:
...
Sec-WebSocket-Accept: GAcwqP21iVOY2yKefQ64c0yVN5M=

| ./net/WebSocketHandler.hpp:576
wsd-00019-00020 2019-01-16 13:22:29.629713 [ prisoner_poll ] TRC  #15: Wrote outgoing data 129 bytes.| ./net/Socket.hpp:1053
wsd-00019-00020 2019-01-16 13:22:29.629742 [ prisoner_poll ] INF  ChildProcess ctor [25].| wsd/DocumentBroker.hpp:72
wsd-00019-00020 2019-01-16 13:22:29.629776 [ prisoner_poll ] DBG  Removing socket #15 (of 2) from prisoner_poll| ./net/Socket.hpp:577
wsd-00019-00020 2019-01-16 13:22:29.629800 [ prisoner_poll ] DBG  #15 Thread affinity set to 0 (was 0x7fe823822700).| ./net/Socket.hpp:279
wsd-00019-00020 2019-01-16 13:22:29.629823 [ prisoner_poll ] TRC  Calling addNewChild in disposition's move thing to add to NewChildren| wsd/LOOLWSD.cpp:1879
wsd-00019-00020 2019-01-16 13:22:29.629847 [ prisoner_poll ] TRC  Adding one child to NewChildren| wsd/LOOLWSD.cpp:467
wsd-00019-00020 2019-01-16 13:22:29.629869 [ prisoner_poll ] INF  Have 1 spare child after adding [25].| wsd/LOOLWSD.cpp:471
wsd-00019-00020 2019-01-16 13:22:29.629894 [ prisoner_poll ] TRC  Notifying NewChildrenCV| wsd/LOOLWSD.cpp:474
wsd-00019-00019 2019-01-16 13:22:29.629938 [ loolwsd ] TRC  Have 1 new children.| wsd/LOOLWSD.cpp:3172
wsd-00019-00019 2019-01-16 13:22:29.629979 [ loolwsd ] INF  WSD initialization complete: setting log-level to [warning] as configured.| wsd/LOOLWSD.cpp:3179
Setting up Collabora Online as a Nextcloud application
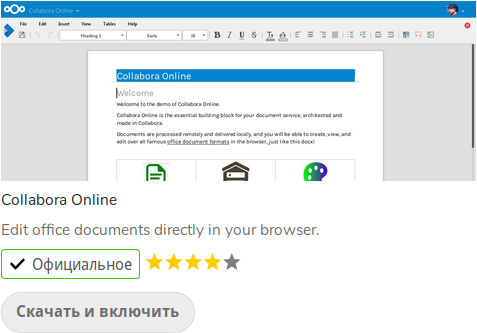
Open the Applications menu, then look for Collabora Online in the Office and Text category and install it.

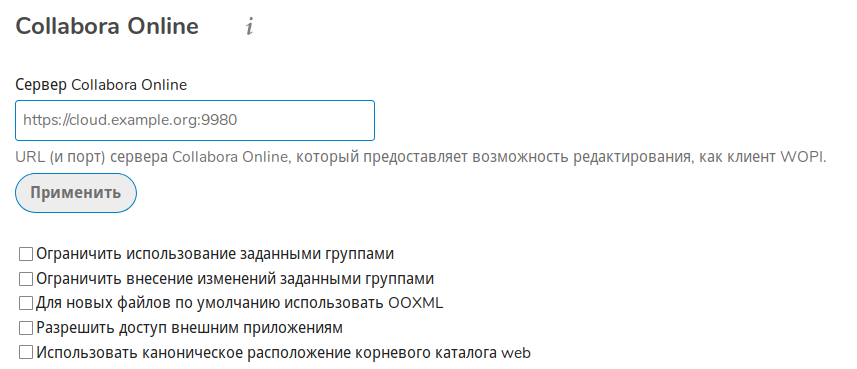
Now open the settings of Collabora Online and specify the server name: http://cloud.example.org:9980 or https://cloud.example.org:9980, depending on the protocol you use.

Updating Collabora Online
To update Collabora, first update the Docker image and then create a new container.
Update the Collabora image:
docker pull collabora/code
Stop and remove the office~ container:
docker stop office; docker rm office
Create and start a new container with Collabora either for HTTP or for HTTPS, as described above.