WireGuard
Updated 27 September 2021

WireGuard is an extremely simple but fast VPN, that uses the most efficient encryption algorithms. It was meant to be faster, easier, more efficient that IPsec and OpenVPN, while providing more functionality. WireGuard was originally designed as an all-in-one VPN to work on both built-in interfaces and supercomputers suitable for a bunch of different tasks. WireGuard first came as a component of the Linux kernel. It has since become cross-platform, supported on Windows, macOS, BSD, iOS, and Android devices.
WireGuard was designed to be easy to install and configure. It can be easily implemented in several lines of code and easily checked for security issues. Compared to such mammoths as Swan/IPsec and OpenVPN/OpenSSL, where code parsing is beyond the reach of even important security experts, anyone can parse the WireGuard code on their own. WireGuard uses the best encryption protocols, such as Noise protocol framework, Curve25519, ChaCha20, Poly1305, BLAKE2, SipHash24, HKDF. Combining ultimate high-speed encryption algorithms and being part of the Linux kernel results in highly efficient secure networking. Check the documentation for detailed info on the protocol: PDF.
Server configuration
Installation
To install the tools required by WireGuard, run:
emerge -a net-vpn/wireguard-tools
Key generation
Create a public and a private key:
cd /etc/wireguard
umask 077
wg genkey > privatekey
wg pubkey < privatekey > publickey
View both the public and the private keys:
==> publickey <==
ACMHojZjwV616cIsToFrQowXMJRxwEThFoEsvJnL/QM=

==> privkey <==
UBrksRvBtaRz0X33E7fvNd43eXC/SpwNsA8wKATVA3w=
Tunnel configuration
Edit the configuration file on the server, adding to it the following:
- Network interface IP for server
- connection port
- private key generated on the server side (i.e. its contents):
For instance, your server's IP might be 192.168.50.1, and your connection port be 51820. For those, the configuration file will look like this:
/etc/wireguard/wg0.conf
[Interface]
# WireGuard network address
Address = 192.168.50.1/24
# Expected connection port
ListenPort = 51820
# Private key for server
PrivateKey = UBrksRvBtaRz0X33E7fvNd43eXC/SpwNsA8wKATVA3w=
Important
If the server uses a firewall, edit its settings for connection via the specified port.
Configure access rights to the configuration file:
chmod 600 wg0.conf
Forward configuration
To set up traffic forwarding between the server's interfaces, add the following lines:
/etc/sysctl.conf
net.ipv4.ip_forward=1
net.ipv4.conf.all.forwarding=1
net.ipv6.conf.all.forwarding=1
To apply the modifications, run:
sysctl -p /etc/sysctl.conf
Routing configuration with Iptables
The server must be configured for dealing with this traffic - to send it over NAT, for example. To route client traffic to the Internet over NAT, run:
iptables -t nat -A POSTROUTING -s 192.168.50.0/24 -o eth0 -j MASQUERADE
Replace eth0 with the local network interface of your server.
Save the routing rules and add them to autostart:
/etc/init.d/iptables save
rc-update add iptables
Routing coniguration with Shorewall
To use Shorewall, follow the configuration procedure as described in the manual.
Starting a server
Add WireGuard to autostart:
rc-update add wireguard
Run the server:
/etc/init.d/wireguard start
Adding the client to the servers' settings
Add client information to the WireGuard settings by specifying the WireGuard interface IP and the public key for the client:
/etc/wireguard/wg0.conf
[Peer]
# Public key for the client
PublicKey = rT9yZRcg2pscyGkder/xTGds5/sy+mX0+Z/yq2RM4HU=
AllowedIPs = 192.168.50.2
Restart WireGuard on the server:
/etc/init.d/wireguard restart
Client configuration
Installation
To install the tools required by WireGuard, run:
emerge -a net-vpn/wireguard-tools
Key generation
Create a public and a private key:
cd /etc/wireguard
umask 077
wg genkey > privatekey
wg pubkey < privatekey > publickey
View both the public and the private keys:
==> publickey <==
rT9yZRcg2pscyGkder/xTGds5/sy+mX0+Z/yq2RM4HU=

==> privkey <==
gFDdeXHCIFEY5t4Tn3ETiZba/ElCxEIj1W8wX/YFVE4=
Tunnel configuration
Edit the configuration file on the client, namely specifying:
- Network interface IP for client
- connection port
- private key generated on the client side (i.e. its contents)
For instance, IP address 192.168.50.2, connection port 51820. For those, the configuration file will look like this:
/etc/wireguard/wg0.conf
[Interface]
Address = 192.168.50.2/24
# Private key for the client
PrivateKey = gFDdeXHCIFEY5t4Tn3ETiZba/ElCxEIj1W8wX/YFVE4=
DNS = 8.8.8.8

[Peer]
# Public key for the server
PublicKey = ACMHojZjwV616cIsToFrQowXMJRxwEThFoEsvJnL/QM=
AllowedIPs = 0.0.0.0/0
# External IP and connection port for the server
Endpoint = wg.example.org:51820
PersistentKeepalive = 20
To exclude private networks from routing over the tunnel, set the following values in AllowedIPs instead of ~0.0.0.0/0:
0.0.0.0/5, 8.0.0.0/7, 11.0.0.0/8, 12.0.0.0/6, 16.0.0.0/4, 32.0.0.0/3, 64.0.0.0/2, 128.0.0.0/3, 160.0.0.0/5, 168.0.0.0/6, 172.0.0.0/12, 172.32.0.0/11, 172.64.0.0/10, 172.128.0.0/9, 173.0.0.0/8, 174.0.0.0/7, 176.0.0.0/4, 192.0.0.0/9, 192.128.0.0/11, 192.160.0.0/13, 192.169.0.0/16, 192.170.0.0/15, 192.172.0.0/14, 192.176.0.0/12, 192.192.0.0/10, 193.0.0.0/8, 194.0.0.0/7, 196.0.0.0/6, 200.0.0.0/5, 208.0.0.0/4, 8.8.8.8/32
Configure access rights to the configuration file:
chmod 600 wg0.conf
Tunnelling
Add WireGuard to autostart:
rc-update add wireguard
Start WireGuard:
/etc/init.d/wireguard start
You can verify the connection on the client side with the route command, or check the external IP address from the client host:
dig +short myip.opendns.com @resolver1.opendns.com
To monitor the connection, run:
interface: wg0
public key: 6BfFNvPQbHKKDENJMRGXu0vVYaOsfEBxFpweNGLvU3Q=
  private key: (hidden)
  listening port: 45741
  fwmark: 0xca6c

peer: EDECjzNvTRsuuxiPD8VTS7N8cmcJ1fUIaANUdrOnbXM=
  endpoint: 1.2.3.4:51820
  allowed ips: 0.0.0.0/0
  latest handshake: 1 minute, 40 seconds ago
  transfer: 2.37 MiB received, 833.84 KiB sent
  persistent keepalive: every 20 seconds
Configuring your Android device
Tunnel configuration
Install the library for encoding data to a QR code:
emerge -a media-gfx/qrencode
You can now generate a QR code based on the client's configuration file.
█████████████████████████████████████████████████████████████████████████████████
█████████████████████████████████████████████████████████████████████████████████
████ ▄▄▄▄▄ █ ▀▀    █▄█▄  ▀▀█▄▄ ▀▄▀ ▄ ▀█▀▀▄ █    ▀▄▀▀ █▀▄▄▄▀▄▀▄ ▀▀  █▄█ ▄▄▄▄▄ ████
████ █   █ █ █▄▀▄█  █ ▀█▀█▀▄█▀▄▀█ █▄▄█▀▀▄▄▄█ ▀▀ ▄▀▀█▄ ▀█ ▀▀▀ █ ▄█ ▀▀██ █   █ ████
████ █▄▄▄█ █▀▀▄▄▀▄█  ▀▄ █▀▄  ▄▄▄ █  ██▀█  █ ▄█ ▀ ▄▄▄  ▀▀ ▄█ █▀█▀ ▀▀▄▄█ █▄▄▄█ ████
████▄▄▄▄▄▄▄█▄█ ▀ ▀ █▄█▄▀▄▀ █ █▄█ █ █▄▀▄█ ▀▄█ █▄█ █▄█ █▄▀ █▄▀▄█▄▀ █ ▀ █▄▄▄▄▄▄▄████
████ ▄▀█▄▄▄█▀▀▄▄ █▀▀▀▄ ▄ █▄▄ ▄ ▄ █ ▀██▄▀██▀█▀ ▀▄ ▄▄▄ ▀▀▀█▀▀▀ ▀▄██▀  █▀█ ▀▄  ▄████
████▀▀▀█▀▄▄ ▀▄▀█▀▀▄█▀█▀▄▄ ▄ ▀▀██▀ ▄▄▄▀█▀█▄▀ ▀▀▀█▀█▄██▀▀█  █▀██▄ ▄▄▄▄ ▀▀▄██  ▀████
████▄▄ ▄ ▀▄█ ▀ █ █▀▀▄ ▄▄▀██ ▄▄ ▀▀█ █ █▄▀▀ ▀█ █▀ ▀█▀ █▀▀▄▀▄█ █▀▀▀█▄██▀▀▀ █▀ ██████
█████▄█ █▀▄ ▄▄▄▄███▀▄██  █  ▀▄█▄█▀▀█▀▀▄█▄ ███▀ ▄▀  ▄▄█▄▀ ▄█▄█▄▀ ▀ ▄█▄ ▀▀   ▀▀████
█████   ▄▀▄█████▀ ▄▄ ▀ ▀ ███   ▄██▀  █▄█▄▀▀▀ █▀█ █▀▀█ ▀█▀▀█▀█▀▀█▀█ ▄▄▀█▄██ ▄▀████
████ █▄▄▀█▄█  ▀▄▀█▀█▀█  █ ▀ █ ▄ ██ ▀▀█▄▄  ▀█ ▀██▀ ▀  ▀█▄ █▄▄█  ▀▀▀█ █ ██  █▀█████
████▄ ▄▀█▄▄▄█ ▀ ▀ ▀  ▄▄ ██▄▄▀ ▄▀█▀█ █▀ █▄█▄█▀  ▄██▀▀█ ▀▄▀ ▀▄█▀▀█▀▀ ▄█▄▄ ▄██▄▀████
█████▀▄ █▀▄ ▄▀▄██  ▀▀▀▀ █▀▀ ██ ▄▄▄▀▄▀  ▄▄█▀▄▀ ▀█▀ █▀▀ ███ ██ █▀ ▄▄▀█ ▄▄▀▄█▄█▀████
████▄▄ ▄ ▄▄▄ █  ██▀ ▄▄█▄ ▀▀▀ ▄▄▄ ██▄ ▀██▄ ▀███▀▄ ▄▄▄ ▀  ██   ▄ ▄▀ █  ▄▄▄ ▀ ▀█████
████▀██▀ █▄█ ▄ ▀  █▄▄██  ▀   █▄█  ▀▄▄█    █▀▄▀█▄ █▄█ ▀▀ ▄▀▀ ▀█▀ ▄  ▀ █▄█ ▄▀█▀████
████ ▀▀  ▄▄  ▄▀██▀▄▀▀▄▄ ▄▀█▄▄  ▄▄█▀ ▄█ █ █▀▄▀▀      ▄█▄▄ ▀█▀█▄█▀ ▀▄    ▄  ▄▄▄████
████▄▀▀ ▀▄▄▀ ▀██ █▄█▄ ██▀▄▄▄▀ ▀  ▀█ ▀█▀█▄▄ █▀███▄█▀ ▄▄█▄▄▄▄ █▀▀▀▀ █▄███▀██▄▄█████
████▄█▀▀▀█▄█   ▀ ▀▀▀██▄▄██▄▀▄▄█ ██  ▄█ █  ▀█▀▄█ ▄▀▄█▄▀▀▀▀ ▀  ▀  ▄ █▀  ▄██▀ █▀████
████▄▀▀█▄▀▄█ ▄█▄▀▀█▀▀ █▄▄█▄▄ ▀▀▄ ▀▄▀▄█▄██ ▀▄▀▀ ▄ █▀▀ ▀█▀ ▀▄▄▀▀▀████▄▀██▄▀█▄█▀████
█████ █▄▄ ▄ █▄█ █ ▄▄▀█▀ █▄▀▄ ▄▄▀█▄  ▄█▀█  ████▀  ▄██ ▄█▀██▀▀██▀ █▄ ▀██▄█▀▀▄▀▀████
████ ▄▀█▀▀▄█▀█▄▄▀▄▀█▀▄ ▀▄▀   ▀   █▀█▄ ██▀▀█▀▄▄██ █▄▄▀▄█▀▀ ███ ▀▄█▄ █▀▀▀▄▄  ██████
████▄██▄▄▄▄ █  █ ▄▄▀▄▀▄█ ▀▄█▀▄ █▀█▄▀▄█▄███▀▄▄ ▀  ▄██▀▀█▀██▄ █▄▀█ ▀▄ ▄██▄▄ █  ████
████▀▀▀█▄ ▄█ ▄█▀▀▄▀█▄▄▀▄▄▀ █ ▀▄ █▄▄▄▄▀▄▀█▄  ▄▀ ██ ▄▄██ █▄ ███▀ ▄▄     ▄▄ ▄  ▀████
████ ▀ ▀ ▄▄▄ ▀▀▄█ ▄▀ ▄▄▄▀▀▀█ ▄▄▄ █▀▀▄█▄█▄ ▀▀██▀▀ ▄▄▄  ▄▄▀▄█▄▄█▄ █▄   ▄▄▄ █ ██████
████  ▀▄ █▄█ ▄██▄▄ ▀  ▀   ▄▄ █▄█  ▀ ▀▀█▀▄ ▄█▀▀ ▀ █▄█ █▄▀ ▄█▄▀▄ ▄▀▀▄█ █▄█  ▄▀█████
████▀▄▄  ▄▄▄▄▀▀█▄▄▀▄▄█   ███▄ ▄  █▀ ██▄█▄▀▀▀██▀█    ▄▄█▀█▀▀ ▀▄█▀▄▄ █▄  ▄ █ ▄█████
████▄▄█   ▄ ▄█ █▀▄█▀▄█  █ ▀▀▄▀  ▀█▀ ██▀▀ █  ▄█▀█▄  ▀█▀▄█▄▀████ ▀█▀▄▄██▄▀▄▄▄▄█████
█████▀ █▄▀▄ ▀▄ ▄  ██ ▄▄███▄█▀▄   ▀█▀▄██▄▀█ ▀▀█▄▄▀▀▀  ▀▀▀▄ █▄█▀█ ▄▀ ▀▀█ ▀ █▀ ▀████
█████ ▀ ██▄█ █▄▄▀█▀▀█▀█▀▄▀▀ ▄▀█▄▄ ▀▄█▄ ▄██ █▄  ▀▄ ███▀█▀▀▀██▄▀ ▄██▀ ▀▀▀█  ▀ █████
████▀ █▄▀ ▄ ▄█ █ █ ▄   ▀▄▄▀█  ▀▀    ▄█▄█▄ ▀█▀█▀▄ ██▀▀▀ █▀█▄ ▄ ███▀▄█▄█▄ ▀ █▀ ████
████▀▀▄▄█▄▄▄ █ ▄ ▀▄▀▄▄▀ ▀▀ ▄█▄▄▀▀ ▄█▄    ▄█ █▀▄▄▄▄█▄ ▄▀▄▄ ▄▄█ █▀▄ █▄ ▄▄█ █   ████
████   ▀▄ ▄▄█▄▄█ █▀▀█▀  ▄ ▄▄▄▄▀█     ███▀█▄▄▀   █▀ ██ ▀ ▀█▄▀▄  ▀ █ ▄▀▄ ▄▀  ▄ ████
████▄▄█ ▀▄▄ ▄  █▄▄██████▀█ ▀█▄▀  ▄█ █▀ ▀  ████▄▄█ █ █▄▄█ ▄▄ ██ ██▀▄▄ █▀█▀▀▄▀ ████
████▄███▄█▄█▀▄▀ █▄▀▀ █ ████▄ ▄▄▄ ██ ▄██▀   █▀██▄ ▄▄▄ ▀▀█▄▀▀██▀▀▄ ▄█▄ ▄▄▄ ▀▀▄ ████
████ ▄▄▄▄▄ █▀▄█▀▄█  ▀ ▄▄▄██  █▄█ ▀▄▀▄█ █ ▀▀▄▀█ ▀ █▄█ ▀█▀▄ ████ ██▄▄█ █▄█ ▄▀  ████
████ █   █ █▄▀▀▀  ██▀█▀ ▄▄▀▄  ▄▄ ▄  ▄▄ █▄ ▄█▀▀▀▄ ▄ ▄▄▄██▄█▀ ▄▀ ▄ █▀▄    ▄▀██▀████
████ █▄▄▄█ █▀██▀▀██ ▀█ ▀█▀ ▀ █▄ ██▀█▄ ▀▄▄▀▄▄▀ █ ▀ ▄ ▄██▄▄ ██▄▄▀█▄▄▀ ▀▀▀▄▀██ █████
████▄▄▄▄▄▄▄█▄▄▄▄████▄▄▄█▄▄█▄████▄█▄█▄▄██▄██▄▄▄▄▄▄█▄█▄▄▄███████▄█▄▄▄▄███▄▄▄▄▄▄████
█████████████████████████████████████████████████████████████████████████████████
█████████████████████████████████████████████████████████████████████████████████
Install the official WireGuard application for Android или iPhone.
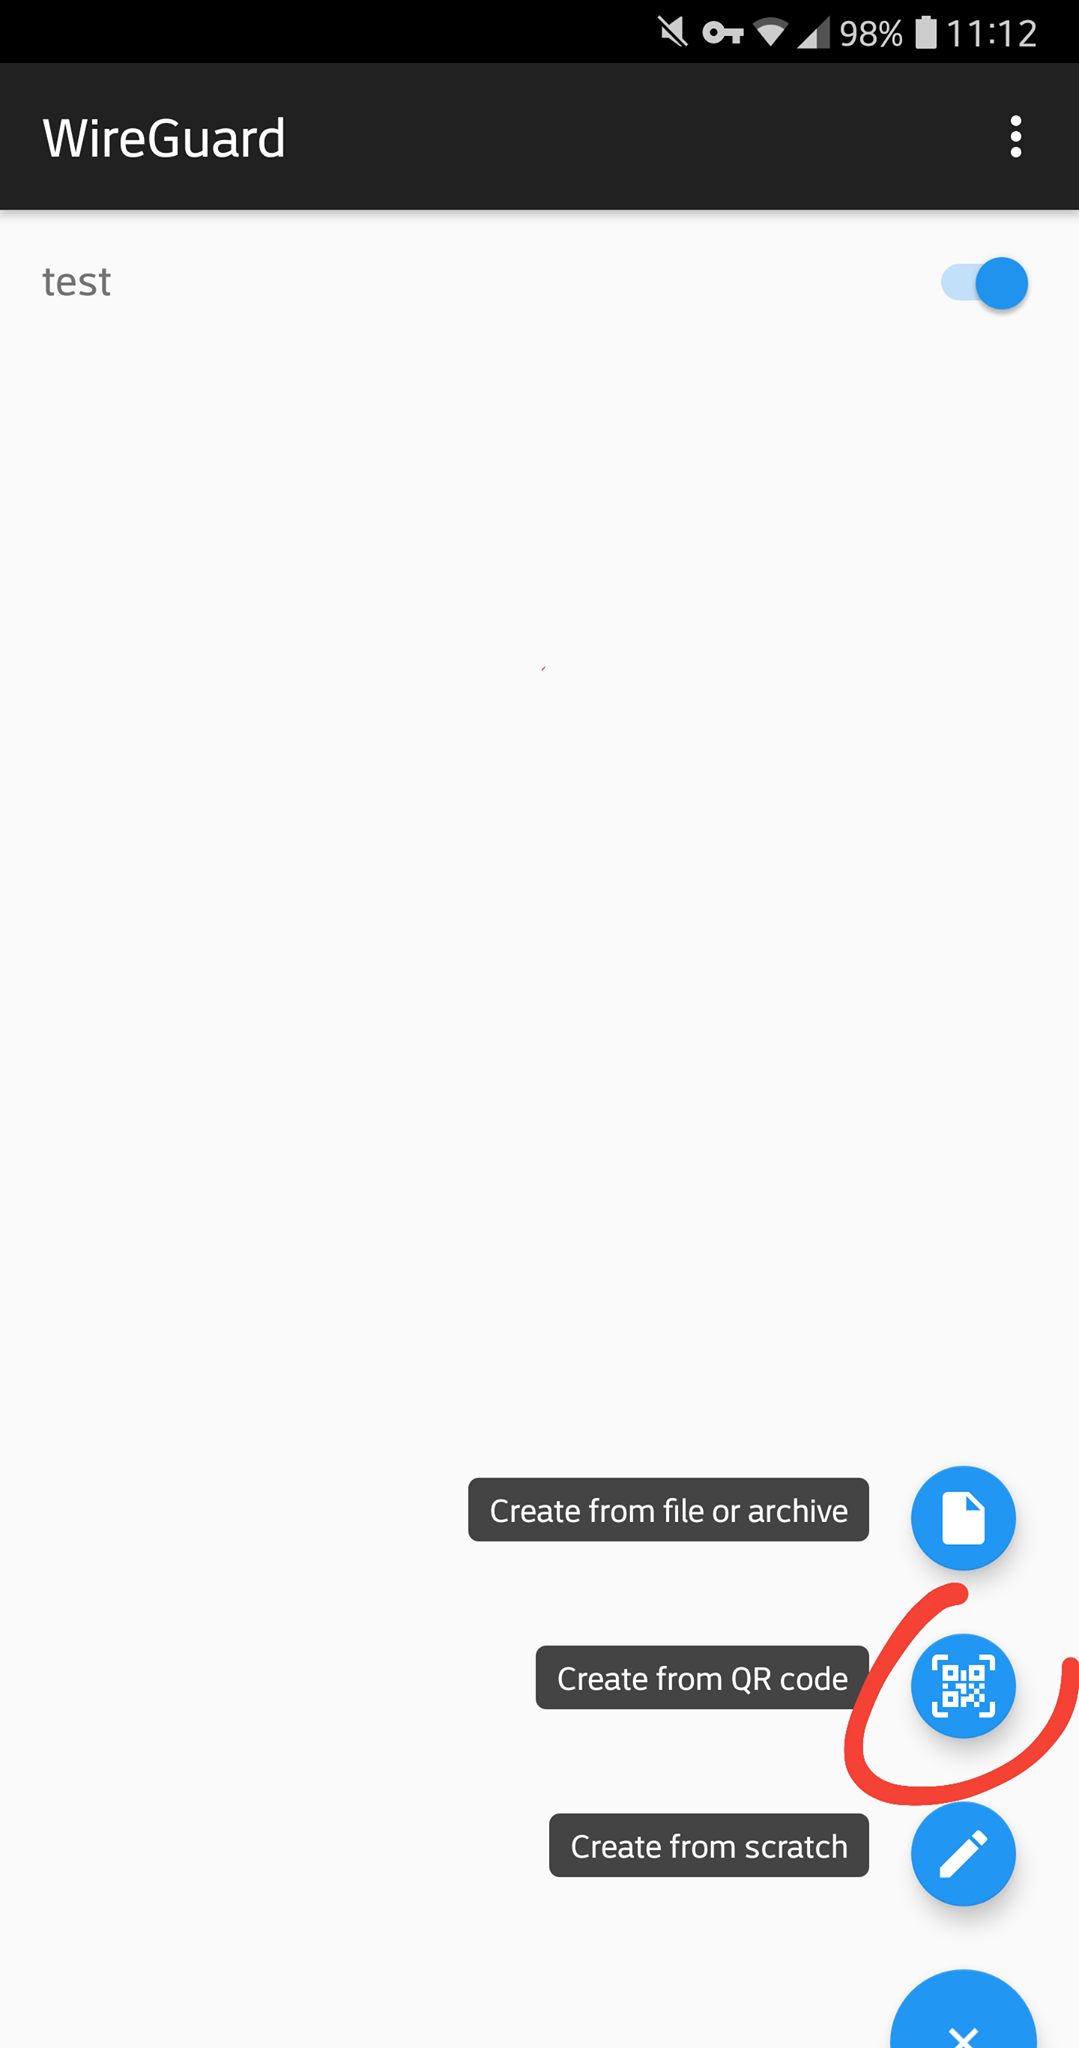
Launch the app and select Create from QR code.

Check
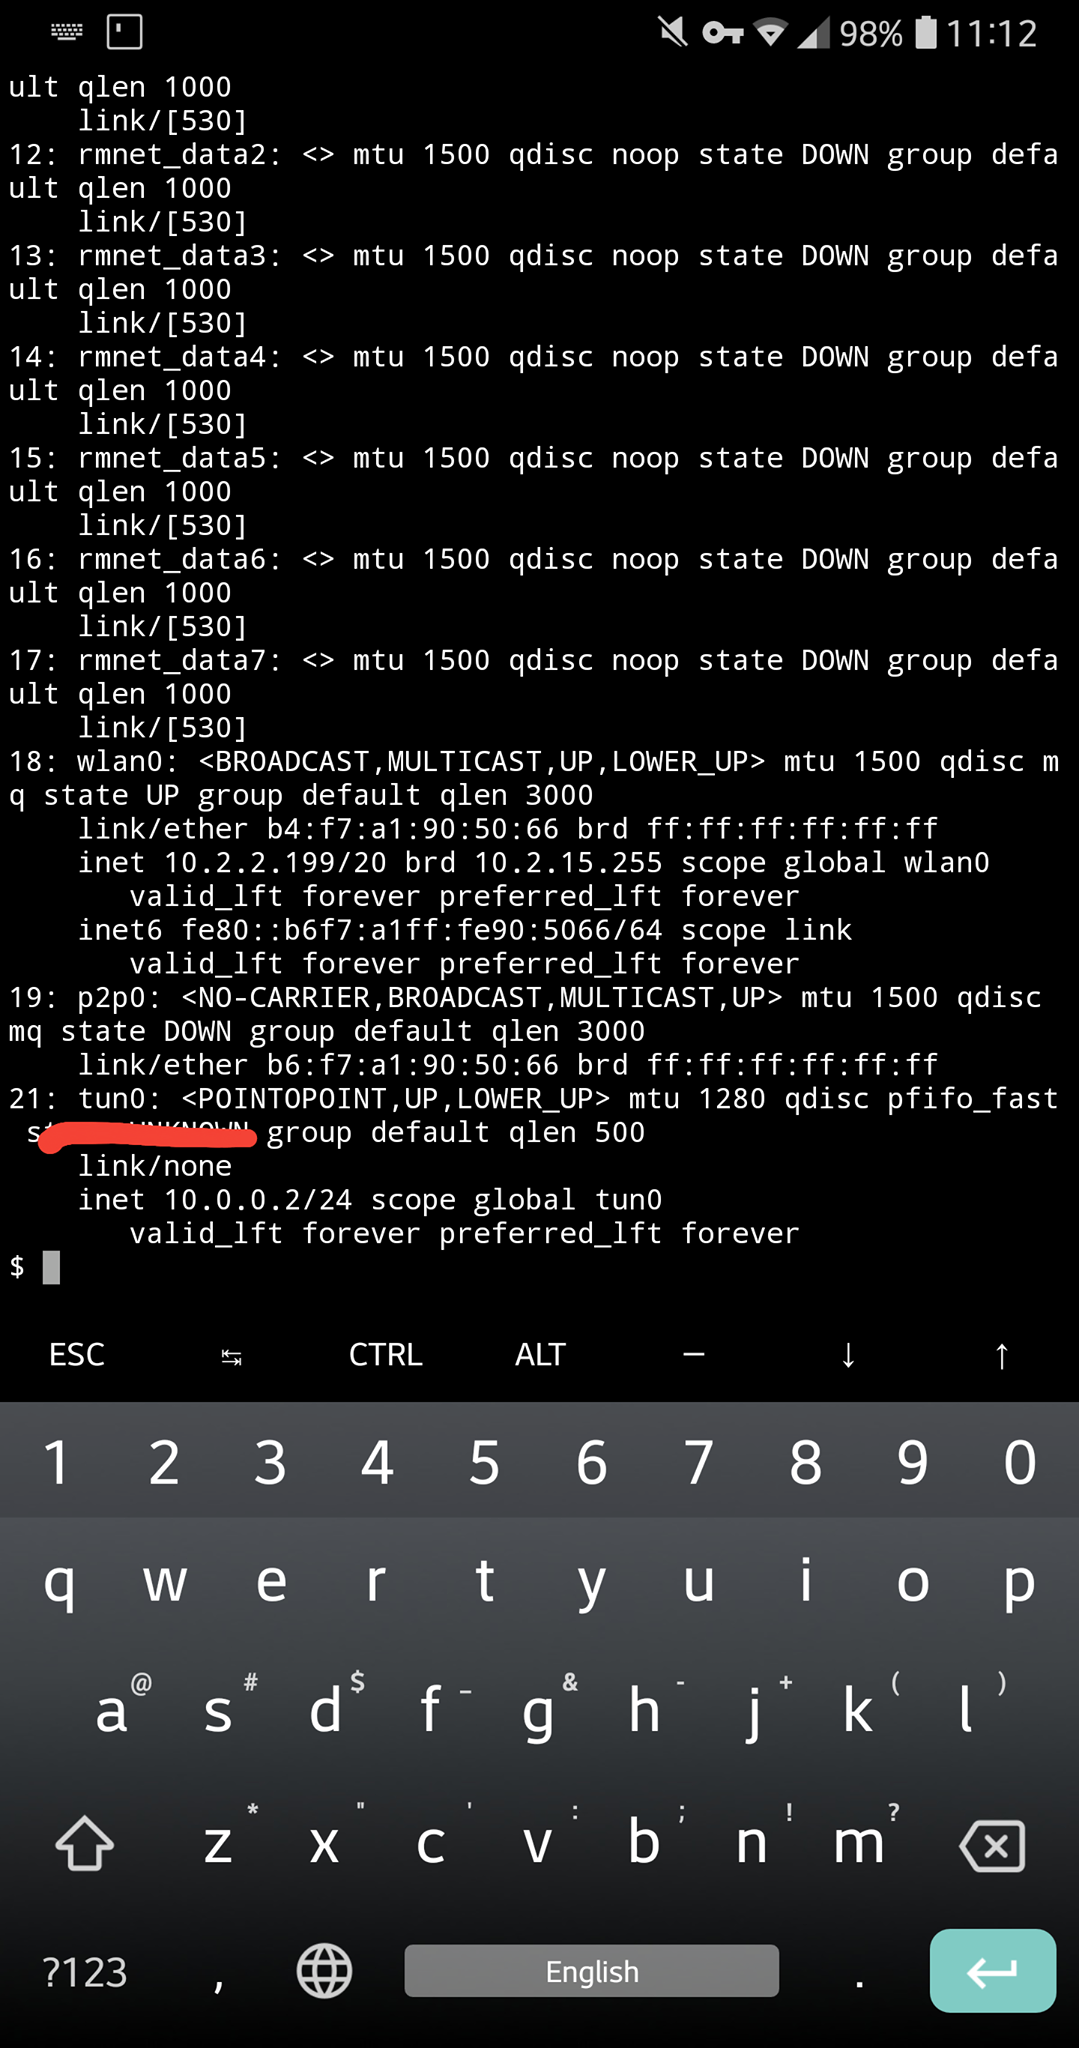
You will need a terminal to check the connection once the tunnelling has started. Terminal Emulator may be a good choice.

